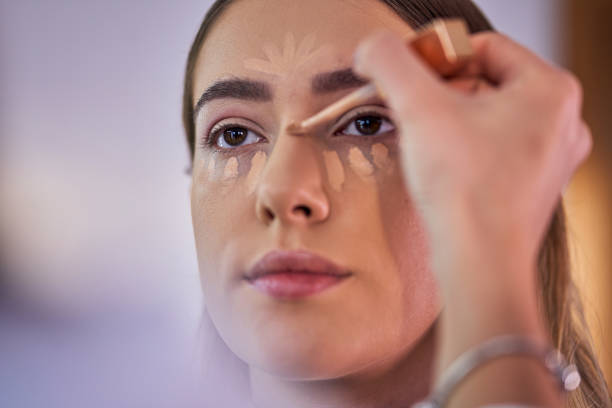
What do you reach for first when you wake up and see dark circles under your eyes? It is your beloved concealer! This concealer is a great tool, but it has often been misused. This guide will help you get the most from this fantastic product.
Selecting a Type
Concealer, like foundation, comes in many formulations to suit all skin types.
- Liquid concealer – This product is suitable for all skin types and provides coverage from light to heavy. This concealer is the most versatile and easiest to use. This is the best type for concealing acne. It is not likely to get caked up, which draws more attention to your blemishes.
- Stick Concealer – This concealer works well on all skin types except oily. In this case, it tends to slip off. The coverage is customizable and can be adjusted from moderate to full. Our favorite part? It can be carried in your purse easily!
- Cream Concealer – Cream concealer is suitable for all skin types but can be very oily. This concealer provides full coverage, and it is the best choice if you want to cover discolorations such as birth marks or melanin. Because it is so heavy, blend it well.
Which brand?
When it comes to concealer brands, the brand is very personal. However, Ben Nye’s makeup has been a favorite of ours. Their products are high-quality and affordable – no wonder they have been around for nearly 50 years.
Selecting a Shade
This is the most crucial part of applying concealer correctly. It should not be too dark. This will make the concealer look muddy and dark.
If you make it too light, you are essentially highlighting your faults.
What shade do you think is right? You should choose one that is just a shade lighter than your foundation.
Other color options
There are many options for concealing imperfections, including skin-toned concealers.
- Yellow is excellent for almost everything. It can be used for all skin types and helps to reduce dark circles and blemishes.
- It is excellent for clearing out acne. However, do not apply it to dark circles! The green tone might emphasize these.
- Although pink is not used as often as it should, it can neutralize dark blues, making it an excellent choice for under-eye circles.
Which comes first: Concealer or Foundation?
This question is currently being debated in the makeup industry. It all depends on what type of foundation your using. Apply concealer first if you are using powder foundation. Conceal after you apply foundation if it is liquid.
Some prefer to apply concealer first, even with liquid foundation. Because you may need less concealer, we prefer to apply it later. The foundation will usually cover most of your flaws so we prefer to start with the best coverage and then go from there.
This exception is for colored concealers (yellows, greens and pinks). Apply foundation after foundation and you will end up with weird colors all over your face. This is where foundation comes in second.
You now know how to choose the correct color. Now you need to apply it. These are quick tips for dealing with different problems:
Circles for the Under-Eye
Start with clean skin. Next, apply a light primer and then a cream to your eyes. Use your preferred tool (we prefer a concealerbrush), draw an upside down triangle along your bottom lashline, ending at your cheekbones. Although it looks a little clownish, once you blend and add foundation, your eyes will really shine.
Dark Spots
Cream concealer is the best choice for covering dark spots or scarring. Cream concealer is thicker than liquid, which means it provides the necessary coverage and staying power.
Use a little bit to apply directly to the area, preferably using a brush.
Redness around the Nose
It’s best to use an oil-free, cream-based concealer as the skin around this region is oily. Use your ring finger to apply your favorite. Apply it to any red areas.
Acne
Don’t panic if you have a stubborn zit. With the right technique you can cover it up. Apply a light layer of color-correcting concealer in green if it is red.
Apply your concealer using a brush or your finger. Pencils are often used for blemishes, as they make it easier to remove the texture of the zit.
Don’t forget to finish it
It doesn’t matter what you are trying to conceal, it is important to apply a thin layer powder. A makeup sponge is our favorite method to achieve this.
Use the sponge to soak, then wring it out and rub it with some powdered. To set the product, lightly pat the areas that are not visible.
This is not the same as the final dusting of powder. It is only to set the concealer. This step should be taken only after you have finished your foundation.
You don’t need to be afraid of dark circles and blemishes. Use this guide to help you see the difference concealer can make for your skin!

